Breast Self-Examination (BSE)
Importance of Breast Self-Examination
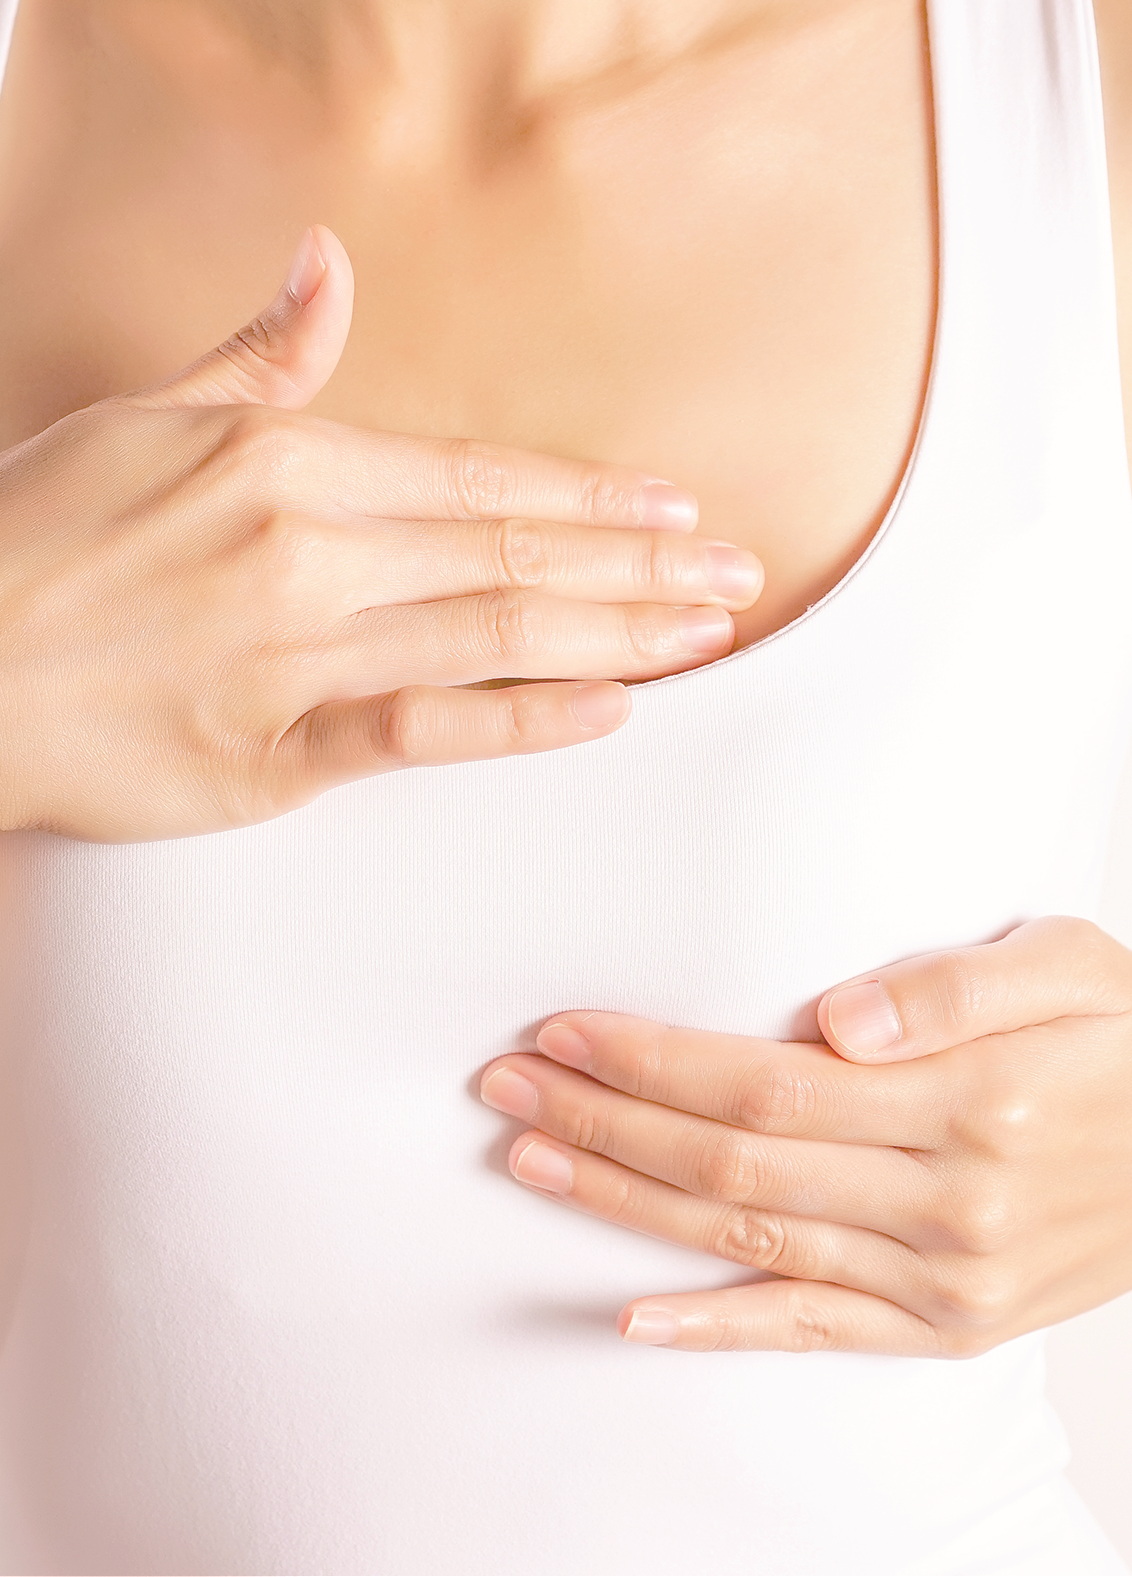
Breast cancer is a common cancer found in Thai women. Detecting cancer in its early stages can lead to a successful cure.
Therefore, every woman should perform a breast self-examination regularly every month.
When should you examine your breasts?
- Perform a breast self-examination every month, starting at age 20.
- Get a breast exam by a doctor or a mammogram every year.
- Starting from age 40 and above.
- For those with a family history of breast cancer, consult a
- doctor for a mammogram earlier than usual, starting at age 30 - 40.
How to perform a breast self-examination
Use the principle of 3 Positions - 3 Patterns - 3 Fingers - 3 Levels.
The 3 Examination Positions
| Position 1: Stand in front of a mirror with your arms relaxed at your sides. Compare both breasts, observing for changes in shape, size, dimpling, skin or nipple retraction, and whether there is any blood or pus leaking from the nipple. |  |
| Interlock your hands above your head and then return to a hands-on-hips position while checking for abnormalities. |  |
| Bend forward, placing your hands on your knees or a chair in a position where the breasts hang straight down; if there are abnormalities, they will be more visible. |  |
| Position 2: Lie down in a comfortable position. Place a pillow or a rolled-up towel under your right shoulder (to examine the right breast). Raise your right arm above your head so the breast tissue flattens out, making it easier to feel for lumps—especially in the upper outer quadrant, where breast tissue is thickest and where cancer most commonly occurs. Use the index, middle, and ring fingers of your left hand to feel the entire breast and armpit. Do not squeeze the breast, as it may feel like a lump when it is not. If examining the left breast, place the pillow under your left shoulder, raise your left arm, and use your right hand following the same steps. | 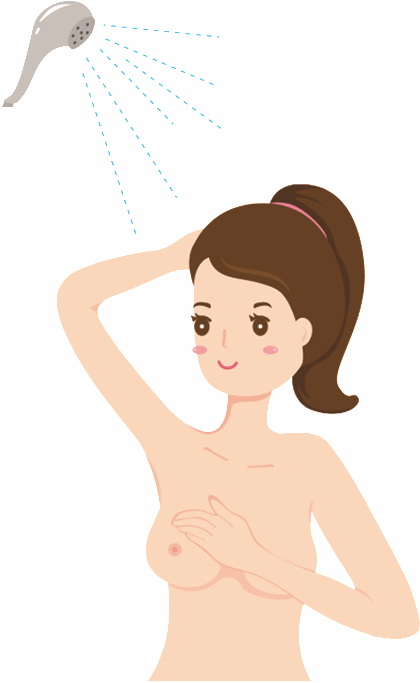 |
| Position 3: While showering, if you have small breasts, place the hand on the same side as the breast being examined on your head and use the other hand to feel in the same direction as in the lying position. If you have large breasts, use the same-side hand to support the breast from below and the other hand to feel from above. |  |
The 3 Palpation Patterns
You may use any one of these methods or use all of them together as follows:
| Circular (Spiral) Pattern
Start palpating from the top of the breast in a spiral motion until you reach the base of the breast and the area around the armpit. | 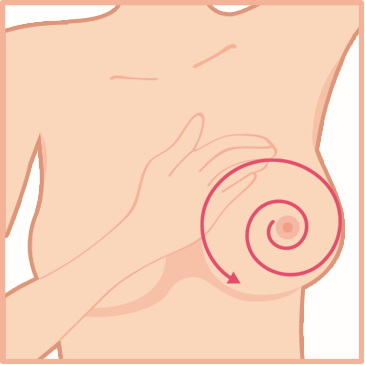 |
| Wedge Pattern Start palpating from the top of the breast to the base, then return to the nipple, repeating this around the entire breast.
| 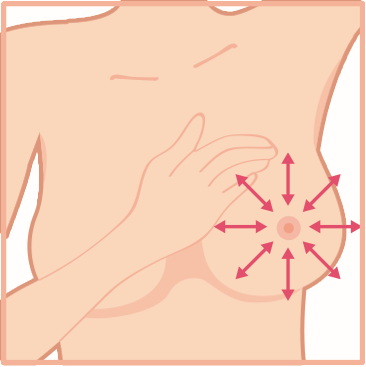 |
| Vertical (Up-and-Down) Pattern Start palpating from under the breast up to the collarbone, then move your three fingers in an up-and-down pattern across the entire breast. | 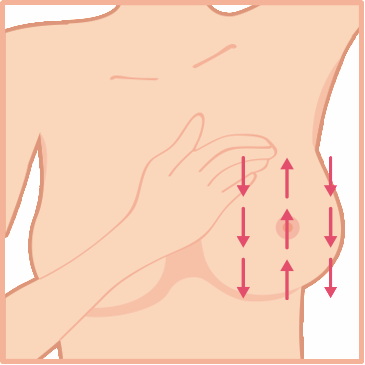 |
The 3 Fingers to use for touch
| Use the pads of your top three fingers (index, middle, and ring fingers). The pads of these fingers sense abnormalities better and cover a wider area than the fingertips. Curve your palm so that the three fingers are flat against the breast tissue. Move your fingers in a circular pressing motion throughout the breast. |  |
The 3 Levels of Pressure
- Light pressure: To feel the tissue just beneath the skin.
- Medium pressure: To feel the middle layer of the breast tissue.
- Firm pressure: To feel the deep tissue close to the chest wall/ribs.
If you find any of the following abnormalities, consult a doctor immediately:
- Discovery of a lump or a hard mass.
- Liquid or blood discharge from the nipple.
- Dimpling of the skin on the breast.
- Abnormal nipple retraction or pulling.
- The two breasts are not at the same level.
- Abnormally different sizes or shapes.
- Chronic sores or expanding wounds with a foul odor.